Showing posts with label Finishes. Show all posts

Tuesday, May 8, 2012

Painting Techniques: Wall Stripes


·      Gives any room a light and sophisticated style with subtle wall stripes, which add a touch of texture and sheen for a soft, subtle look. The style goes well with pale-toned furnishings and rich fabrics or with luxurious accents such as large pillows and lush window treatments.

Step 1 - Prepare Your Surfaces 
Be sure any surface is properly prepared before you begin. Clean your walls thoroughly and repair any protruding nails or other imperfections. 
Step 2 - Apply Your Base Coat 
Paint your wall(s) with two base coats
Step 3 - Apply Tape
Before you apply the glaze mixture to your wall(s), apply tape to the ceiling and baseboards. 
Step 4 - Create a Glaze Mixture
Step 5 - Mark Your Wall Stripes
Determine how wide you want the stripes to look, and use a pencil to lightly mark your wall(s). To make sure you have straight marks, use a level as you mark.
Step 6 - Apply Tape
Apply one-inch painter's tape around the room. To ensure that every other stripe is 12 inches wide, apply tape on the outside of the marks with the first stripe, on the inside with the second, and so on.
Step 7 - Apply the Glaze Mixture
Pour your glaze mixture into your paint tray, and dip a cotton rag into the mixture. Apply the mixture onto your walls with a circular motion, taking care not to stray outside the 12-inch stripes.
Once each stripe is complete, remove the tape and continue painting the stripes around your room.


Meredith Woolfolk


Painting Techniques: Smooshing Technique


  • Smooshing paint lends the elegant look of moirĂ© wall coverings or a simple marbled effect to a room, with a technique that is easy to use.


Step 1 - Apply the Base Color 
Paint your wall(s) with the desire color and allow to dry for 24 hours.
Step 2 - Apply Tape 
Before you apply the glaze mixture to your wall, tape off your ceiling and baseboards.
Step 3 - Prepare the Glaze Mixture
Step 4 - Apply the Glaze 
Apply the glaze to your wall quickly. If you estimate you will eed more than 10 to 15 minutes to put the glaze on the entire wall, do it in smaller sections.
Step 5 - Drop Sheet 
Press a plastic drop sheet onto the wet glaze -- it will adhere on its own. Drop sheets of 1-mil thickness provide the best results.
Using your hands, smooth the plastic against the wall. Then wrinkle or rub it along the wall - anything that will move the plastic. It will probably not require more than five minutes to cover your entire wall.
Step 6 - Remove the Plastic
Step 7 - Apply Glaze on Your Next Wall 
Roll the glaze on the next wall planned for your project and repeat the steps above. Make sure you use a fresh sheet of plastic for each wall.

Special Remarks:
   Use tape to protect areas you do not plan to cover with glaze, such as windows and door frames.
   For long walls, buy one-millimeter-thick plastic in a roll. Roll your glaze on in six-foot sections and then apply the plastic. 
Repeat for the next section until the wall is complete.
   Use a paint brush to apply your glaze mixture around ceilings and in corners.
For the best results with other colors, use a tone-on-tone, such as a darker blue over a lighter blue.


Meredith Woolfolk
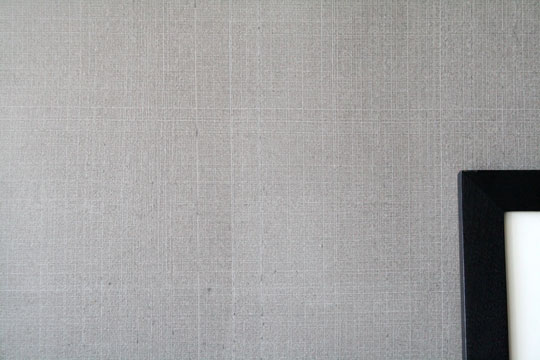


Painting Techniques: Glitter Wall Paint


  • With the glitter effect, tiny specks of reflective material in the finish catch the light, adding a whimsical twinkle to rooms or painted furnishings. It can be applied either as a transparent topcoat over any painted surfaces, or as a veil of sparkle on walls or craft projects.
  • Because it dries to a clear, durable, washable finish, our glitter topcoat is ideal both for children's rooms and for objects such as chairs and chests. It can also lend an elegant, ethereal quality to more formal settings, such as the walls of a dining room
Step 1 - Prepare Surfaces
Be sure your surface is properly prepared before you begin your project. Clean your walls thoroughly and repair any protruding nails or other imperfections.
Step 2 - Apply the Base Color 
Apply your selected base color onto properly prepared walls.
Step 3 - Apply the Finish 
Apply a specially formulated glitter for walls topcoat to add a veil of iridescent glimmer to your walls and trim.


 Special Remarks:
   Try a coat of glitter effect over a painted toy chest to protect the finish and add a touch of magic.
   When applying glitter to walls, select rooms where sconces or table lamps will draw out its shine. Glitter looks particularly lovely by incandescent light and candlelight, which emphasize its twinkling, reflective qualities.
 Meredith Woolfolk


Painting Techniques: Geometric Shapes


Step 1 - Apply the Base Color 
Apply your selected base color onto properly prepared and primed walls. An Eggshell Finish with Advanced Particle Technology is recommended.

Step 2 - Plan Your Layout 
Using graph paper, sketch the layout of your color blocks. The size of your wall will determine how large you will need to make the squares/rectangles for a balanced effect.
Planning ahead for the number and placement of the shapes you will use will give you an idea of how to apply each color to achieve the effect you want.

Step 3 - Create Your Block Design 
Using a level to make straight lines, mark off your block design on your wall with a white pencil or chalk. Tape off several squares/rectangles of varying sizes with painter's tape, taking care to choose shapes that do not touch one another.

Step 4 - Apply Glaze 
Apply the desired Metallic Glaze (or any glaze) onto the taped off shapes, using an additive ragging technique. Allow glaze to dry completely and once it is dry, remove the tape.

Step 5 - Create A Pattern 
Create a pattern by outlining and taping off additional squares and rectangles over original shapes.
When it comes to painting these geometric shapes on your walls, use a rag to apply different colors of glaze you selected in as many different colors as you want, within the outlines. Keep adding glaze until you achieve your desired look.

Special Remarks:
               Use a T-square to ensure the accuracy of lines and angles.
Use light pencil marks to outline where your tape should be placed.


Meredith Woolfolk

Dry Brushing Technique


Step 1 - Paint Your Walls
Paint your wall(s) with two base coats. Allow at least 24 hours for it to dry.
Step 2 - Tape the Ceiling 
Apply tape to the ceiling and baseboard before you apply brush coats to your wall.

Step 3 - Ready Your Brush 
Dip the tip of your brush in the first brush coat of the desired color. Remove any excess paint by dabbing your brush on a piece of cardboard.

Step 4 - Brush the Walls 
Using a stroke about 8 to 12 inches long, brush your wall at a 45-degree angle. Also make a second brushstroke adjacent to the first, at an opposite 45-degree angle, to create a herringbone pattern.
Repeat this brushing pattern to fill in a four-by-four-foot section of the wall, re-dipping your brush in the paint as needed.

Step 5 - Apply a Second Coat 
Use the second desired color for the second coat over the first in the same pattern, but be looser in creating your angles.
With the second coat, the idea is to soften the pattern created by the first coat. When you finish, move to your next four-by-four-foot section and repeat the steps above.


Step 6 - Apply a Third Coat 
When you have finished painting your walls, brush on the third coat with the desired color randomly in select areas to create highlights.


Special Remarks:
               The secret to this technique is not to apply too much paint. If your brush becomes too dry and does not appear to add any paint to the surface, dip it in water and shake well.
               When selecting colors, choose from within the same color family or those that are tints or shades of each other, to ensure they blend well together on the wall.
               When using the dry brushing painting technique, keep in mind that you'll be using small hand-sized tools, so your project may take extra time to complete.
               You can achieve the dry-brushing look in the corners with a few dabs of a paint brush.
               Do not worry when the first brush coat is applied. It will be dark, but the second brush coat will soften the look.

Meredith Woolfolk


Exterior Painting

Here are some steps towards properly painting an exterior.

Materials:

  • exterior flat/eggshell paint
  • exterior semi-gloss paint
  • paint sprayer
  • paint brush
  • ladder
  • paint scraper
  • stain blocking primer
  • epoxy filler
  • medium grit sanding block
  • spackle knife
  • exterior caulk
  • caulk gun
  • plastic sheeting
Steps:
  1. Pressure-wash the walls to remove any dirt or dust build up to ensure the smoothest coat application
  2. Asses and repair all damaged areas. Fill holes and cracks with epoxy using a spackle knife. Sand smooth once dry.
  3. Remove any loose or chipped paint using a paint-scraper
  4. Fill any gaps with caulk on the exterior (near trims or where two materials meet)
  5. Examine the exterior for any stains or wood knots. Apply a stain blocking primer to these areas.
  6. Cover windows, doors, and lights with plastic bags
  7. Use a paint sprayer and spray from top down. Overlap each line about 8 inches to ensure best coverage.
  8. Paint the trims and doors with two coats of semi-gloss paint.

Hayden Manders

Monday, May 7, 2012

Leathering a Wall

Paint and plastic bags can be used to create the look of leather on a painted wall.

Materials:
  • plastic bags
  • paint rollers
  • china bristle brushes
  • latex glaze
  • cheesecloth
  • water bottle
  • latex paint in eggshell
  • top-coat glaze
Steps:
  1. Paint a base coast and allow it to dry
  2. Using a 1:1 ratio of latex paint to latex glaze dip a crunched up plastic bag and dab on the wall continually crunching the bag to change the pattern.
  3. Lightly dab
  4. Use a dry brush to take off any excess paint
  5. Let the wall dry completely
  6. Apply top-coat glaze with a roller over the whole wall to blend colors and add luster. A damp cheesecloth will smooth any dark spots the roller leaves behind.

Hayden Manders

Strie Paint Technique

Strie is a painting technique used to achieve the look of fabric on an interior wall. It is also called dragging. Walls should be in good condition. One must work fast with this process and be careful not to let the paint build up or "gum" the strie effect. 

Materials needed are:
  • bristle brushes
  • latex glaze
  • latex paint in eggshell/satin/semi-gloss finishes
  • water bottle
  • rags
  • paint pad
Steps towards achieving this effect:
  1. Prime the walls and apply the base coat
  2. Allow base to dry and mix the glaze with accent color using a 1:2:1 ratio of paint to glaze to water
  3. Spray a paint pad with water and dip it into the mixture (less is more here) and apply it to the wall in one smooth vertical stroke.
  4. As soon as the paint goes on, take a dry brush and run it down the line. Keep the brush dry by wiping it clean with a cloth between paint pad and brush steps.
  5. Finish the wall in the same manner. Let it dry.
  6. Follow steps 3-5 only applying the paint mixture in a horizontal fashion.


Hayden Manders

Mottling

Mottling is defined as spots or smears of color. While it can be a detrimental sign a wall needs refinishing, it is also an aesthetic that many have chosen to employ on their interior walls. Mottling offers an aged look and creates a dynamic wall. Mottling is similar to the Roman and Greek Frescos we see and study to day.

Here are some basic steps towards getting this look:

  1. Paint the walls a base color using an eggshell/semi-gloss/satin paint and allow for it to dry.
  2. Mix the glaze using a 4:1 ratio of glaze to base paint. A more transparent look will be achieved by using more glaze.
  3. Mix the accent color paint with the glaze with a 4:1 ratio (the same transparent v. opaque rules apply as in step 2).
  4. Using a roller, apply the base glaze in an irregular pattern to ensure the even-ness of the glaze. 
  5. While the base glaze is still wet, use a cloth or brush to apply the accent glaze. It's a good idea to work with a partner during this step. Blot the accent glaze in a cris-crossing pattern. Rinse the cloth or brush often so no glaze builds up and causes the finish to become uneven.
  6. Continue with this process until the wall is covered.

Hayden Manders

Finishing techniques

Company Name: Grand Illusion Decorative Painting Inc
Style: Finishing Techniques
Address: 20 W. 20th St. Unit 1009, New York, NY 10011
Telephone: (212) 675-2286
Email: info@grandillusionnyc.com
Website: www.grandillusionnyc.com
Products Information / model numbers:


Gilded Finish:


Special Remarks:


"Based in New York City for the past 30 years, Pierre has made a name for himself as a specialist in high-end residential and 19th century European period style.
Pierre’s business grew rapidly as designers, architects and clients became aware of his abilities producing believable renditions of faux marble, wood, and ornamentation techniques.  Clients look to Pierre to give expert advice and color consultation and to meticulously create custom finishes for every project" -grand illusion

Finishing Techniques

Kendall Cardone


Company Name: McCollum Interiors: A resource of fine decorative finishes
Style: Finishing Techniques
Address: 320 East 95th Street 
Third Floor 
New York, NY 10128
Telephone: 212 868 0943 
Email: info@mccolluminteriors.com
Website: http://www.mccolluminteriors.com
Contact Person: Cynthia McCollum- Decorative Artist
Products Information / model numbers:


marbling 
trompe l'oeil 
woodgraining 
gilding 
stenciling 
mural painting 
glazing 
plaster 
restoration 
furniture


Gilded + Antiqued Ceiling niche 


Special Remarks: Specializing in decorative wall and floor finishes. Work with interior designers, contractors and homeowners.

Friday, May 4, 2012

Faux by Kathy

Amelia Stein

Company Name: Faux by Kathy
Style: DIY faux finishes
Address: 504 East St. Charles Rd, Carol Stream, IL 60188 
Telephone: 800-797-4305
Email: kcarroll@fauxbykathy.com
Website: http://www.fauxbykathy.com
Contact Person: Kathy Carrol
Products Information / model numbers:
Special Remarks:  Kathy Carrol is the owner of The Chicago Institute of Fine Finishes. She teaches a variety of specialty finishes for walls, floors and furniture. There are over 5,000 finishes to choose from a variety of manufacturers all within her e-store.


Carol Pascale

Amelia Stein

Company Name: Carol Pascale
Style: fine art, decorative painting and murals
Address: Media, PA
Telephone: 610.892.9309 
Email: mesage via website
Website:http://www.carolpascale.com
Contact Person:Carol Pascale & Dave Pascale
 painted yellow medous breccia marble
 painted zebra wood
 plaster finish
 hand-painted panel mouldings
painted lapis lazuli

Field Decorative Finishes

Amelia Stein

Company Name: Field Decorative Finishes
Style: highend decorative finishes
Address: 285 McKIBBIN STREET BROOKLYN NY 11206
Telephone: 718-387-8247
Email:info@fieldfinish.com
Website:http://www.fieldfinish.com
Contact Person:n/a
 agregate plaster over brick with glaze
 black high polished venetian plaster
embroidery plaster

Dean Barger, decorative finishes

Amelia Stein

Company Name: Dean Barger Studios
Style: high end decorative finishes/renaissance decorative artistry
Address: 111 E. 14th St, #202 NY, NY 10003/Northeast Harbor, Maine
Telephone: 212.252.2273
Email: info@deanbarger.com
Website: http://www.deanbargerstudios.com
Contact Person: Dean Barger
Special Remarks: Trained as a fine artist, Dean brings a lifelong love of art to his work, offering his clients a wide repertoire of skills and experience. He has completed commissions with many of today's top interior designers and architects, infusing his projects with the spirit of his ancient craft while keeping an observant eye on contemporary style and taste.


Faux Bois & faux marbre


distressed jacobean pattern on mirror


folk landscape

Tuesday, April 24, 2012

Staining

Staining hardwoods and concrete has the potential to dramatically (or subtly) enhance the quality of a space. Stains can be applied to hardwood floors, wooden furniture, decks, mouldings, and concrete floors. Below are a few basic staining methods:

1. Know what the material you are about to stain is.
  • Soft woods = pine, fir, cedar (uneven wood grain...will leave uneven stain unless prestained)
  • Hardwoods = oak, beech, elm, ash, birch, walnut (consistent pattern to wood grain...does not have to be pre-treated but may take a few more coats)
2. Clean material so that it free of dust and grease and then begin to sand
  • The lower the grit number - the rougher the wood will be and the more stain will absorb into the wood and the darker the stain will be. 
  • The higher the grit number, the smoother the wood will be, the less will absorb into the wood will require more coats of stain).
3.  Apply stain with a damp rag or cloth - a brush works fine, too. Be sure the movement across the material is smooth. Wait for the stain to set (about 15 minutes...the longer you wait the darker it will be). Wipe off color when you are satisfied with stain.

4. Polyurethane can be added for protection.


Here are some types of stain:
  • Oil-based stains are longer lasting in tone color
  • Water based stains finish evenly
  • Pastels are an oil-based wood stain that provide a soft pastel color that highlight the grain of the wood (more of an accent stain)
  • Pigment stains fill the grains and leave the wood surface less colorful
  • Dyes will stain the grain and the areas between the grain approximately the same color

Staining Wood Video


                                                             Staining concrete video


-Hayden

Paint Techniques: Crinkle Paper Painting

Step 1: Prepare the Area
  • Applying a fresh base coat isn't necessary.
  • You could use latex paint in an eggshell finish with a glaze of your choice. 
  • Use an old paintbrush or China bristle brush to dust baseboards, trim and crown molding before taping them off. 
Step 2: Paint and Apply the Tissue Paper
  • Paint an area slightly bigger than the size of the tissue paper you're using. 
  • Crinkle a piece of tissue paper to create texture; open it up, and adhere it to the wet paint surface, smoothing it as desired. Don't worry about ripping the paper, just smooth the surface with your fingers and continue.
Step 3: Paint Over the Tissue Paper
  • Load the roller again and paint over the tissue paper. If you don't like the way the paper lays against the wall, smooth it out with your fingers before painting over it again. Tear off excess paper around the wall edges, corners and baseboards.
  • Continue in a horizontal line across one wall, overlapping the tissue paper each time so there aren't any flat areas. 
  • Cover the rest of the wall in the same fashion, making sure to apply the tissue paper in neat rows.
  • For an older look, add an antique glaze over the dried surface. 
Meredith Woolfolk