d. Faux finishes
Chalk Paint™ Stenciled Floor Cloth
Posted January 11 2012 Painted and stenciled floorcloths have a rich history - used in homes throughout England and the United States prior to the invention of linoleum, they were often made from recycled canvas ship sails. For a quick and easy alternative floor covering for a trade show, Melanie created this amazing stenciled vinyl floorcloth using Annie Sloan Chalk Paint on the BACK side of some pre-cut vinyl.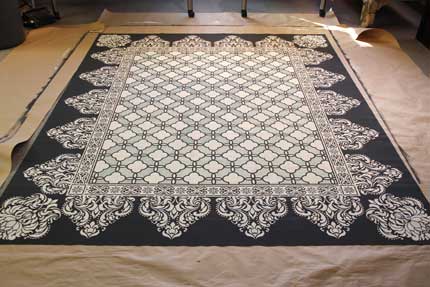
You can create a similar project with either traditional floorcloth
canvas, but we recommend using a better quality, thicker vinyl for use
in an area that will get regular traffic.
Supplies Used:
Inexpensive sheet vinyl - thicker and harder for traffic areas
White Primer
Annie Sloan Chalk Paint in the following colors:
Short-nap 4″ roller
Annie Sloan Lacquer
How-To:
Apply 2 coats of white primer to the BACK of your sheet vinyl:

Roll on on two coats of Annie Sloan Graphite Chalk Paint.

You can easily mix and match several stencil patterns on a large
surface to create your own custom design. Choose stencil designs in a
variety of scales with similar elements. For inspiration, take a look
at the stylistic variety within a typical oriental rug.
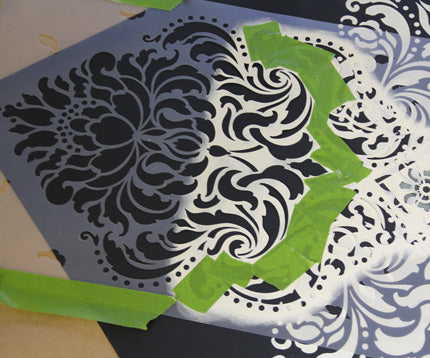
For this project, Large Eastern Lattice Stencil is used at the centerpiece, framed with the Classical Border & Corner Stencil. The Florentine Damask Stencil creates the lacy scalloped edge and corner detail.
Next, mark off the placement of your border - calculate the space needed for the outer elements and measure in from the outside edge.

For this project:


Go little Queenie! This stencil how-to shows you how to create a fun,
random stencil pattern with an easy dimensional effect using crown
stencils from our Wall Art & Motifs Stencil Collection. Use a combination of two colors of stencil paint with a nifty stencil shift to give some POP to your stencil patterns.
You will need:
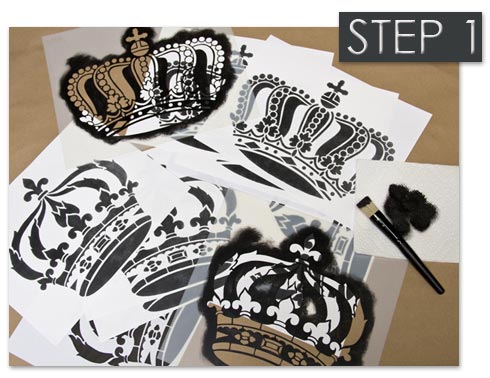 Step 1: This step is optional,but it's a GREAT aid to help you plan out a random stencil pattern on a wall!
Simply stencil one repeat of each of the crown stencil designs in black
on plain white paper. Run off multiple copies to create a series of
stencil "proofs" and you are ready to plot out your pattern design on
the wall.
Step 1: This step is optional,but it's a GREAT aid to help you plan out a random stencil pattern on a wall!
Simply stencil one repeat of each of the crown stencil designs in black
on plain white paper. Run off multiple copies to create a series of
stencil "proofs" and you are ready to plot out your pattern design on
the wall.
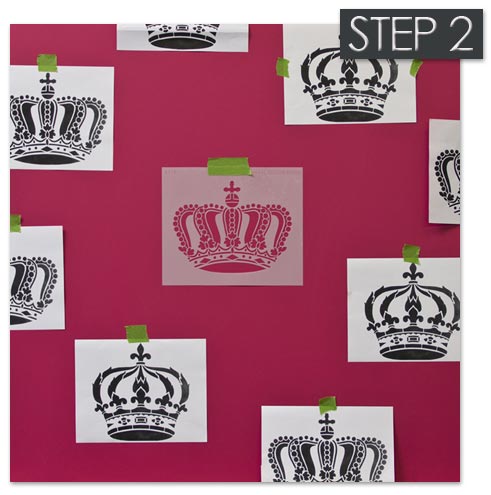 Step 2: Use tape to affix your stencil proofs to your wall
area. This will give you a great visual guide to how your pattern lays
out and works in your space. Simply move the paper proofs around until
you get a desirable effect, playing with spacing and variety of designs.
When I do random stencil patterns I try to make sure that all designs
are offset a bit-meaning that they do not fall necessarily on the same
horizontal or vertical lines, creating balance AND interest. As you work
the stencil patterns across the wall, simply remove the paper pattern
and replace with the corresponding stencil. You can then keep moving the
paper patterns ahead of yourself to keep the pattern placement going.
Step 2: Use tape to affix your stencil proofs to your wall
area. This will give you a great visual guide to how your pattern lays
out and works in your space. Simply move the paper proofs around until
you get a desirable effect, playing with spacing and variety of designs.
When I do random stencil patterns I try to make sure that all designs
are offset a bit-meaning that they do not fall necessarily on the same
horizontal or vertical lines, creating balance AND interest. As you work
the stencil patterns across the wall, simply remove the paper pattern
and replace with the corresponding stencil. You can then keep moving the
paper patterns ahead of yourself to keep the pattern placement going.
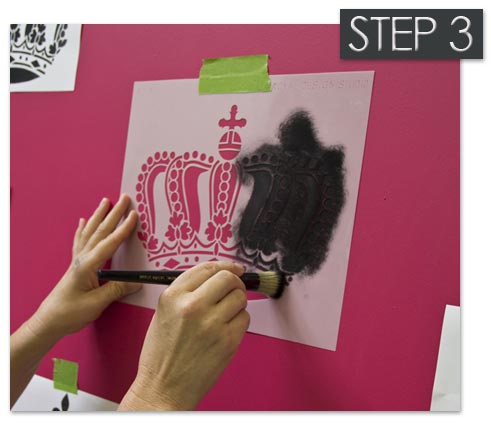 Step 3: Load the brush with paint, and then offload your stencil brush onto good quality paper towels to remove excess paint and get even paint distribution on your brush. See Basic Stenciling with Acrylics for more details.
 Step 4: Aim for solid, even coverage with the paint. If you offloaded your brush correctly, you will get a perfect, crispy stenciled print of the pattern.
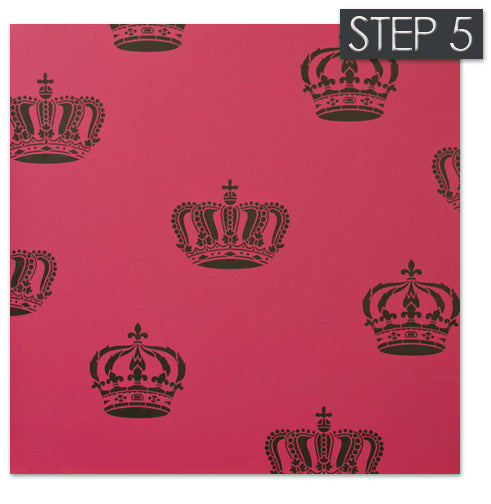
Step 5: Complete all of your stencil patterns first with the
black paint. If you like the clean look of the black crown pattern, you
can stop here. If you want to "bling it on", read on!
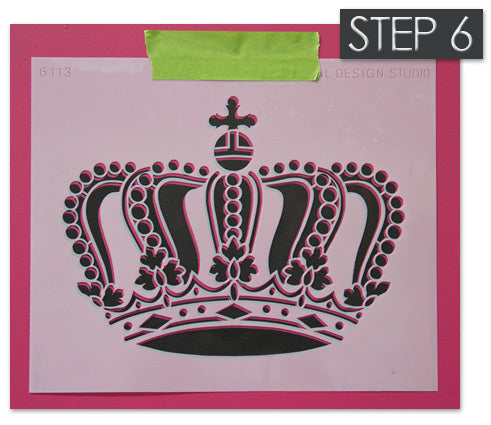
Step 6: OK, here's the semi-tricky part. Place your stencil pattern back on the wall exactly over your previous stenciling.
Keeping the pattern level, shift the stencil on the diagonal (up and to
the right) between 1/16" and 1/8". The amount of pink background that
you see exposed will end up being the amount of black shadow that you
will be left with after the next step.
PRO TIP: Practice this first on some scrap paper so that you get the amount of "shift" down. Shift too much and you will be left with a dizzying effect. Shift too little and you won't have a definitive shadow.
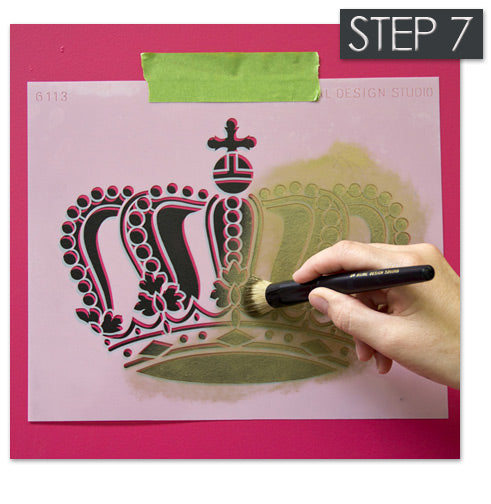
Step 7: Use Antique Gold Stencil Creme to stencil over the entire pattern again. Metallic Royal Stencil Cremes
offer AMAZING coverage, usually in just one coat, but you may want to
stencil a second coat of paint if you have a "light touch". Read more
about how to use Royal Stencil Cremes here!
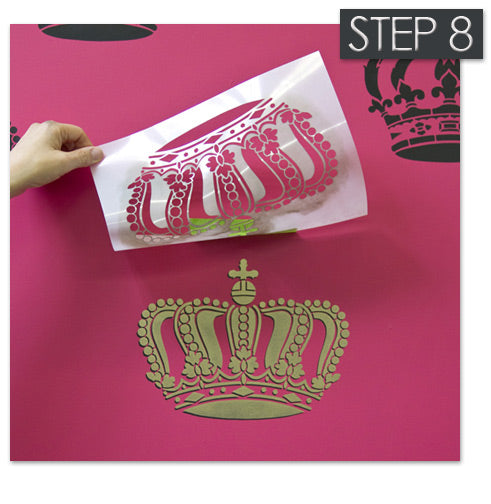
Step 8: Lift the stencil up while keeping the tape in place to check that you have the amount of Stencil Creme coverage you want. Looking fabulous darlings!
Continue with your stencil-shift technique to complete your overall
pattern. Take care to shift the stencil the same amount EACH time so all
your crowns have the SAME COOL SHADOW.

Step 9: What would the Royal Crowns be without the Crown
Jewels? Use self-adhesive jewel accents from the scrap booking section
of your local craft store to add some more bling. Have fun with this and
be creative!
For this project, Large Eastern Lattice Stencil is used at the centerpiece, framed with the Classical Border & Corner Stencil. The Florentine Damask Stencil creates the lacy scalloped edge and corner detail.
Next, mark off the placement of your border - calculate the space needed for the outer elements and measure in from the outside edge.
- Measure in 14.5" from the outside edge (space for Florentine Damask "lace edge"
- Mark with a chalk pencil; tape off outside the marks
- Measure in an additional 4" for the border; leave 4" space between for placing the border
- Burnish the tape to prevent paint from seeping under
Next, Roll on two coats of Annie Sloan Old White Chalk Paint with a short nap 4" roller for the border.
Measure to locate the center of the large inner rectangle
Center one repeat of your stencil design element to ensure symmetrical pattern placement at both edges
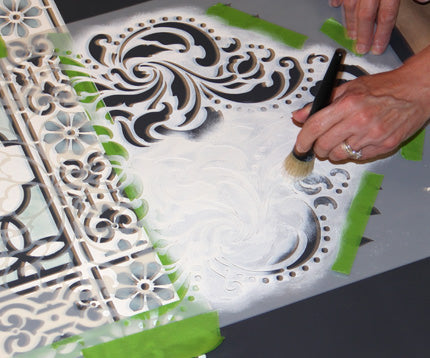
Alternate stenciling with a brush (2" stencil brush shown here) for detail or use a roller to cover larger areas more quickly
Tape the stencil securely to
minimize seepage. Chalk paint dries quickly so you can go back over to
touch up details with a smaller stencil brush.
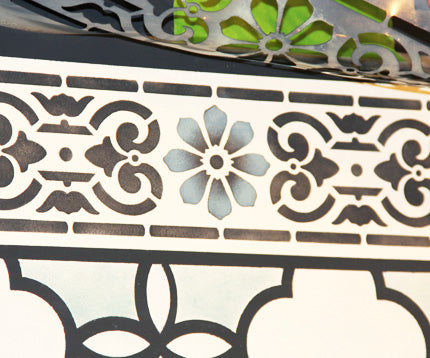
Mark off corner blocks first, and center the border pattern to be symmetrical along each edge:
Here, the petal details in Duck Egg Blue are stenciled over the white border background using a dry brush technique with a 3/4″ stencil brush.
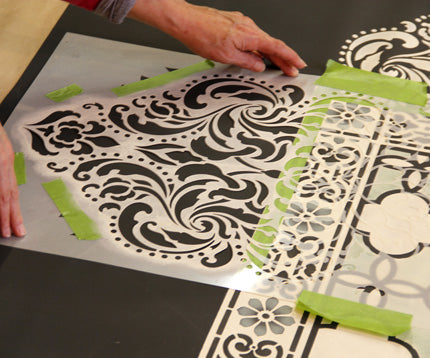
Position the Florentine Damask Stencil edge, taping off to protect your work on the border.
The size of your floorcloth will determine the number and spacing of the lacy petals
Again, notice how she's taped off the black areas of the design while working with the Old White Chalk Paint.
Melanie taped of part of the stencil design to fit a damask stencil "petal" in each corner - the perfect finishing detail!
Finally, Seal and protect your work with 2 two thin coats of Annie Sloan Lacquer, a matte, water-based finish designed to work with the Chalk Paint.
Stencil How-to: Create a Drop Shadow Effect for a Crowning Touch
Posted January 08 2013You will need:
- Queen Crown Stencil
- King Crown Stencil
- Antique Gold Stencil Creme
- 2-1" Stencil Brushes
- Pink Paint Color: Glamorous P130-7 by Behr Paints
- Assorted: Black Craft Acrylic Paint, Bounty Paper Towels, White Paper, Painter's Tape, Assorted Stick-On "Jewels"
PRO TIP: Practice this first on some scrap paper so that you get the amount of "shift" down. Shift too much and you will be left with a dizzying effect. Shift too little and you won't have a definitive shadow.
Stencil How to: Playing Dress Up with Stencils
Posted January 29 2013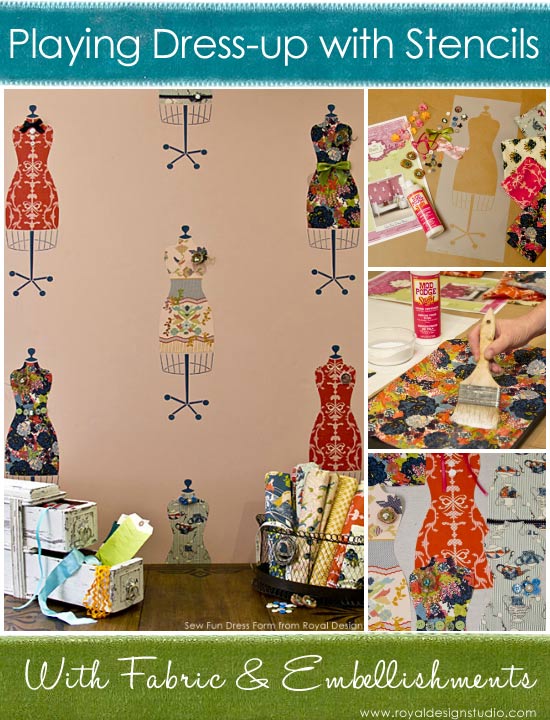
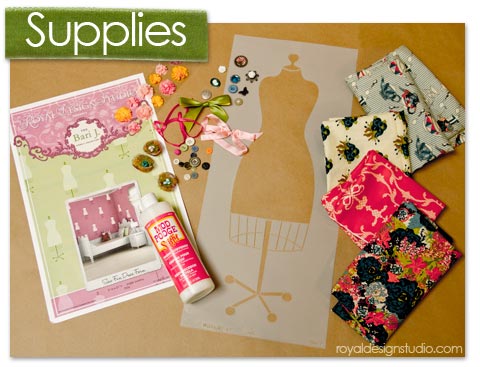
Supplies Needed for this Stencil Project:
- Royal Design Studio Stencil: Sew Fun Dress Form wall stencil
- Behr Premium Plus Ultra Paint: (basecoat) MSL043 Nasturtium, (stenciling) S460-7 Deep Breath
-
3/4" Stencil Brush
-
Mod Podge Stiffy Fabric Stiffener
- Assorted Fabrics from the Bari J. Fabric Collection
- Painter's Tape
-
3M Super 77 Spray Adhesive
-
Assorted Embellishment (ribbon, buttons, scrapbooking elements)
-
Hot Glue Gun
-
Baking Sheet or Shallow Tray
-
Wax Paper
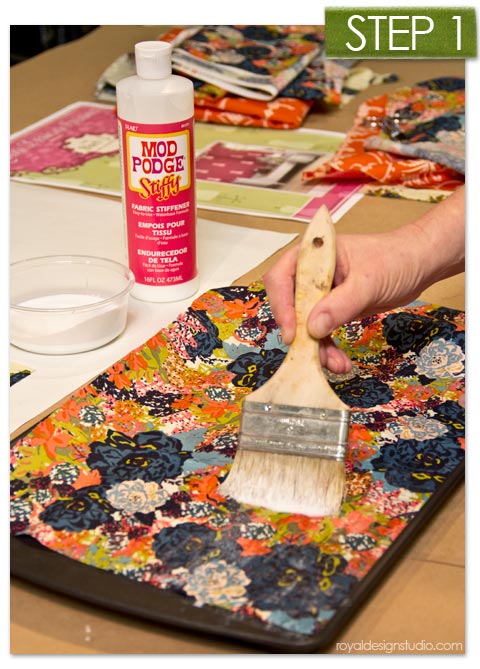
Step 1: Following manufacturer's directions, apply Mod Podge Stiffy Fabric Stiffener to both sides of the fabric with a chip brush
making sure the fabric gets saturated thoroughly. Lay wet fabric on a nonstick
surface to dry, making sure the fabric is completely flat while it
dries. Note: If the fabric becomes wrinkled while it dries you can iron out
the wrinkles by placing the fabric between two sheets of wax paper. This
prevents the fabric from sticking to the iron or the surface. Set the
iron on low and iron on a hard surface.
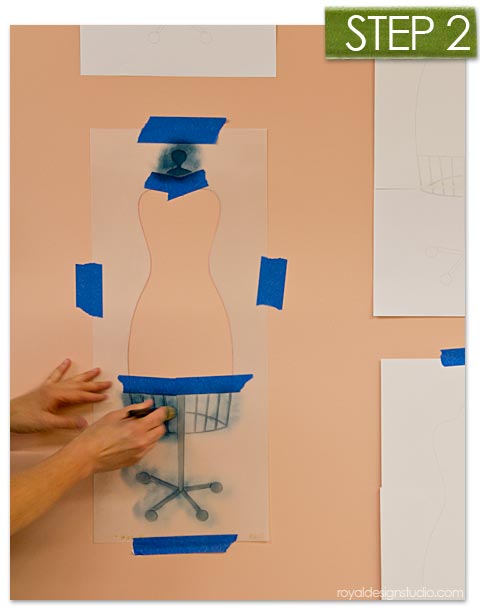
Step 2: While your fabric is drying, go ahead and determine the placement for your Sew Fun Dress Form stencils. See this how-to post for more tips on laying out a stencil motif pattern on a wall. Stencil in the top and bottom of stencil pattern in Behr paint color Deep Breath
or a similar color in a craft fluid acrylic paint. Note that the dress
form body is taped off to keep the stenciled paint from getting into
that area. We then traced the dress form with chalk using the stencil as
a guide for fabric placement. Alternatively, you could simply stencil ALL in blue paint, as the fabric shapes will cover the "body".
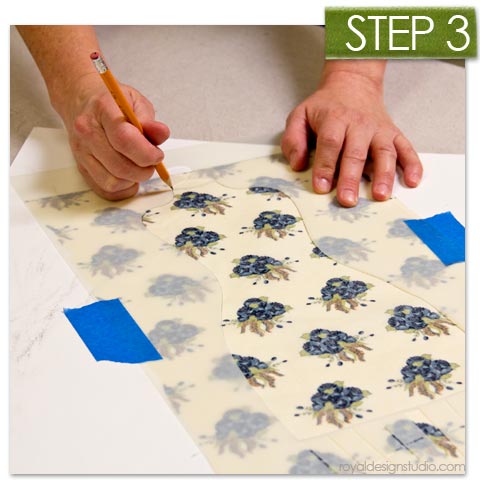
Step 3: When the fabric is dry and
flat, use the clean stencil to trace the dress form outline
on the back side of your fabric. Play with how the shape of the dress
form works in different areas of the fabric to create different looks.
Cut out the patterns with a good pair of scissors. The Mod Podge Stiffy Fabric Stiffener will keep your fabric from fraying, giving you a nice clean edge.
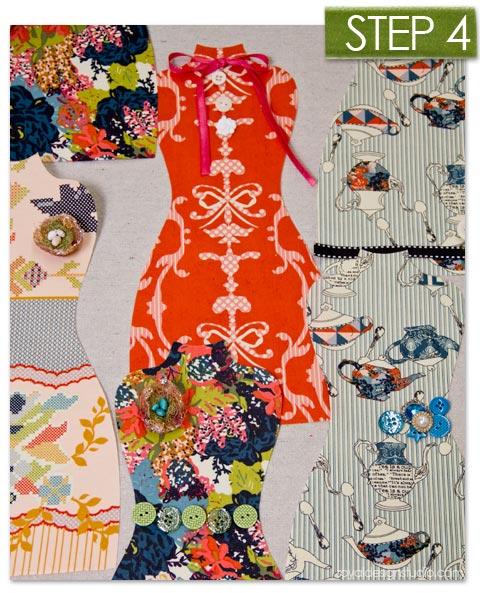
Step 4: Gather all your little
ribbons and assorted goodies and have a good old time accessorizing your
dresses. It is a good idea to lay them out on a table so you can plan
how the patterns and colors of the dress forms will work to compliment
each other in your overall design scheme.

Step 5: Spray the back side of the
fabric dress forms with a good misting of spray adhesive, paying
attention to the edges of the fabric. Note: Be sure to allow for good ventilation and protect surrounding areas when using Spray Adhesive.
Allow the adhesive to set up for a couple minutes before placing the
fabric forms on the wall. Use a credit card or similar "tool" to smooth
and bond the fabric shapes to the wall securely
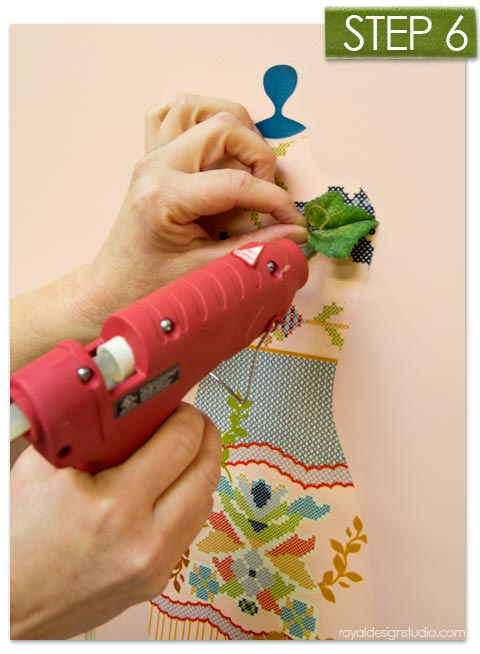
Step 6: Add embellishments by using a
hot glue gun. Apply the glue to the embellishments not the surface, and
stick into place. Watch out for those fingers!

Who knew you could have Sew Much Fun with stencils?!
Well, actually, WE did, and hope you are inspired to try this type of
project for your own studio, little girl's room, or as a way to
personalize your closet.
Here are some other ideas for using this type of mixed media stencil idea:
- Using fabric for the large silhouette area of the stencil pattern along would work equally well with the Parlor Chair wall stencil from Bari J.
- You can see another stencil technique where we stenciled pattern in pattern to create a fabric look.
- Use this stencil and technique for framed canvas art, or even on a very special gift box.
- Substitute newspaper, patterned paper or pretty gift wrap for the fabric.
- Use your amazing imagination for many more ideas: cut up maps, posters, love letters, photocopies of family photos, etc.
- Use an Embossed Stencil Technique for the Dress Form frame for added dimension.
No comments:
Post a Comment